


JumpServer主要作用是为了帮助企业以更安全的方式管控和登录各种类型的资产,符合4A规范,采用了分布式架构设计和容器化的部署方式,是当下最受欢迎的堡垒机之一。下文将围绕JumpServer堡垒机的安装、管理和设置展开介绍。

一、JumpServer堡垒机安装(Linux单机部署)
1、环境要求JumpServer堡垒机支持主流的Linux发行版本,基于Debian / RedHat,包括国产操作系统。不过请注意,Gentoo / Arch Linux请通过源码安装,生产环境推荐离线安装包。
JumpServer堡垒机支持的操作系统包括linux/amd64和linux/arm64,软件要求“wget curl tar gettext iptables python”。
硬件配置最低要求2核CPU、8G内存和60G HDD硬盘。本站整理了各大国外服务器商家的方案配置和优惠活动,若您刚好有服务器租用需求建议参考:
Debian / Ubuntu:
apt-get update
apt-get install -y wget curl tar gettext iptables
RedHat / CentOS:
2、在线安装(中国大陆)yum update
yum install -y wget curl tar gettext iptables
进入 /opt 目录并下载安装包:
cd /opt
wget https://resource.fit2cloud.com/jumpserver/installer/releases/download/v4.10.2/jumpserver-installer-v4.10.2.tar.gz
tar -xf jumpserver-installer-v4.10.2.tar.gz
cd jumpserver-installer-v4.10.2# 根据需要修改配置文件模板, 如果不清楚用途可以跳过修改
cat config-example.txt# JumpServer configuration file example.
#
# If you don’t understand the purpose, you can skip modifying this configuration file, the system will automatically fill in
# Complete parameter documentation https://docs.jumpserver.org/zh/v3/guide/env/################################# Image Configuration #################################
#
# The connection to docker.io in China will timeout or the download speed will be slow, enable this option to use Huawei Cloud image acceleration
# Replace the old version DOCKER_IMAGE_PREFIX
#
# DOCKER_IMAGE_MIRROR=1# Image pull policy Always, IfNotPresent
# Always means that the latest image will be pulled every time, IfNotPresent means that the image will be pulled only if it does not exist locally
#
# IMAGE_PULL_POLICY=Always############################## Installation Configuration #############################
#
# JumpServer database persistence directory, by default, recordings, task logs are in this directory
# Please modify according to the actual situation, the database file (.sql) and configuration file backed up during the upgrade will also be saved to this directory
#
VOLUME_DIR=/data/jumpserver# Encryption key, please ensure that SECRET_KEY is consistent with the old environment when migrating, do not use special strings
# (*) Warning: Keep this value secret.
# (*) Do not disclose SECRET_KEY to anyone
#
SECRET_KEY=# The token used by the component to register with core, please keep BOOTSTRAP_TOKEN consistent with the old environment when migrating,
# Do not use special strings
# (*) Warning: Keep this value secret.
# (*) Do not disclose BOOTSTRAP_TOKEN to anyone
#
BOOTSTRAP_TOKEN=# Log level INFO, WARN, ERROR
#
LOG_LEVEL=ERROR# The network segment used by the JumpServer container, please do not conflict with the existing network, modify according to the actual situation
#
DOCKER_SUBNET=192.168.250.0/24# ipv6 nat, no need to enable under normal circumstances
# If the host does not support ipv6, enabling this option will prevent the real client ip address from being obtained
#
USE_IPV6=0
DOCKER_SUBNET_IPV6=fc00:1010:1111:200::/64################################# DB Configuration ####################################
# For external databases, you need to enter the correct database information, the system will automatically handle the built-in database
# (*) The password part must not contain single quotes and double quotes
#
DB_ENGINE=postgresql
DB_HOST=postgresql
DB_PORT=5432
DB_USER=postgres
DB_PASSWORD=
DB_NAME=jumpserver# If external MySQL needs to enable TLS/SSL connection, refer to https://docs.jumpserver.org/zh/v3/installation/security_setup/mysql_ssl/
#
# DB_USE_SSL=true################################# Redis Configuration #################################
# For external Redis, please enter the correct Redis information, the system will automatically handle the built-in Redis
# (*) The password part must not contain single quotes and double quotes
#
REDIS_HOST=redis
REDIS_PORT=6379
REDIS_PASSWORD=# If you are using external Redis Sentinel, please manually fill in the following content
#
# REDIS_SENTINEL_HOSTS=mymaster/192.168.100.1:26379,192.168.100.1:26380,192.168.100.1:26381
# REDIS_SENTINEL_PASSWORD=your_sentinel_password
# REDIS_PASSWORD=your_redis_password
# REDIS_SENTINEL_SOCKET_TIMEOUT=5# If external Redis needs to enable TLS/SSL connection, refer to https://docs.jumpserver.org/zh/v3/installation/security_setup/redis_ssl/
#
# REDIS_USE_SSL=true################################# Access Configuration ################################
# The service port provided to the outside, if it conflicts with the existing service, please modify it yourself
#
HTTP_PORT=80################################# HTTPS Configuration #################################
# Refer to https://docs.jumpserver.org/zh/v3/installation/proxy/ for configuration
#
# HTTPS_PORT=443
# SERVER_NAME=your_domain_name
# SSL_CERTIFICATE=your_cert
# SSL_CERTIFICATE_KEY=your_cert_key
## Nginx file upload and download size limit
#
CLIENT_MAX_BODY_SIZE=4096m################################# Component Configuration #############################
# Component registration use, by default, register to the core container, the cluster environment needs to be modified to the cluster vip address
#
CORE_HOST=http://core:8080
PERIOD_TASK_ENABLED=true# Core Session definition,
# SESSION_COOKIE_AGE indicates how many seconds the session expires after idling,
# SESSION_EXPIRE_AT_BROWSER_CLOSE=true means that the session expires as soon as the browser is closed
#
# SESSION_COOKIE_AGE=86400
SESSION_EXPIRE_AT_BROWSER_CLOSE=false# Trusted DOMAINS definition,
# Define the trusted access IP, please modify according to the actual situation, if it is a public IP, please change to the corresponding public IP,
# DOMAINS=”demo.jumpserver.org:443″
# DOMAINS=”172.17.200.191:80″
# DOMAINS=”demo.jumpserver.org:443,172.17.200.191:80″
DOMAINS=# Configure the components that do not need to be started, by default all components will be started, if you do not need a certain component, you can set {component name}_ENABLED to 0 to turn it off
# CORE_ENABLED=0
# CELERY_ENABLED=0
# KOKO_ENABLED=0
# LION_ENABLED=0
# CHEN_ENABLED=0
# WEB_ENABLED=0# Lion enables font smoothing to optimize the experience
#
JUMPSERVER_ENABLE_FONT_SMOOTHING=true################################# XPack Configuration #################################
# XPack package, invalid setting in open source version
#
SSH_PORT=2222
RDP_PORT=3389
XRDP_PORT=3390
MAGNUS_MYSQL_PORT=33061
MAGNUS_MARIADB_PORT=33062
MAGNUS_REDIS_PORT=63790
MAGNUS_POSTGRESQL_PORT=54320
MAGNUS_SQLSERVER_PORT=14330
MAGNUS_ORACLE_PORTS=30000-30030################################## Other Configuration ################################
# The terminal uses the host HOSTNAME as the identifier, automatically generated during the first installation
#
SERVER_HOSTNAME=${HOSTNAME}# Use built-in SLB, if the client IP address obtained by the Web page is not correct, please set USE_LB to 0
# When USE_LB is set to 1, use the configuration proxy_set_header X-Forwarded-For $remote_addr
# When USE_LB is set to 0, use the configuration proxy_set_header X-Forwarded-For $proxy_add_x_forwarded_for
USE_LB=1# The current running version number of JumpServer, automatically generated after installation and upgrade
#
TZ=Asia/Shanghai
CURRENT_VERSION=# 安装
./jmsctl.sh install# 启动
./jmsctl.sh start
安装完成后JumpServer配置文件路径为: /opt/jumpserver/config/config.txt
cd /opt/jumpserver-installer-v4.10.2
# 启动
./jmsctl.sh start# 停止
./jmsctl.sh down# 卸载
./jmsctl.sh uninstall# 帮助
./jmsctl.sh -h
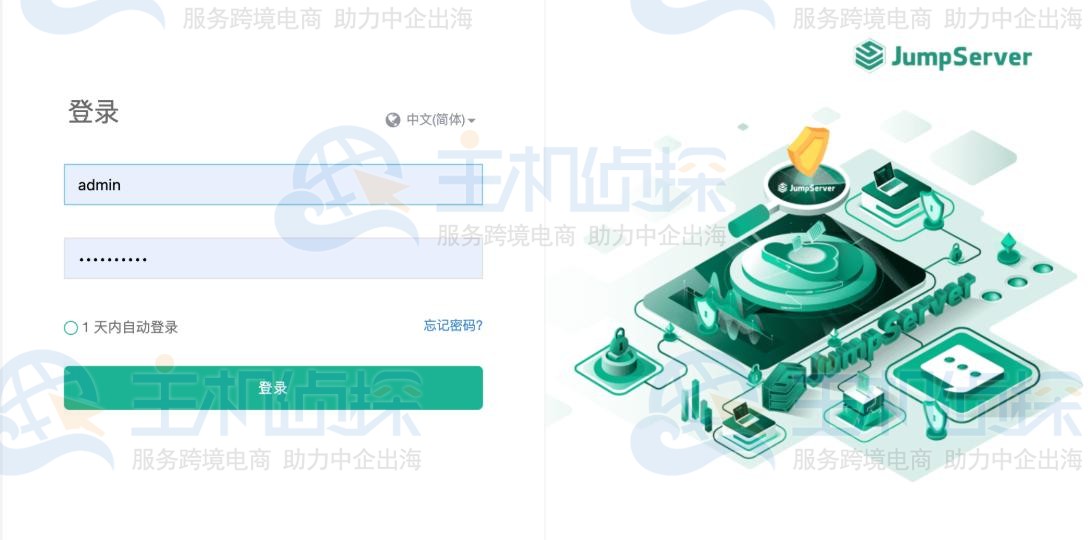
安装成功后,通过浏览器访问登录JumpServer堡垒机:
3、离线安装(中国大陆)地址: http://<JumpServer服务器IP地址>:<服务运行端口>
用户名: admin
密码: ChangeMe
离线安装JumpServer堡垒机目前只支持linux/amd64架构, 其他架构请参考上方在线安装。
首先下载最新的 linux/amd64 离线包, 并上传到部署服务器的 /opt 目录。
执行以下命令:
cd /opt
tar -xf jumpserver-ce-v4.10.2-x86_64.tar.gz
cd jumpserver-ce-v4.10.2-x86_64# 根据需要修改配置文件模板, 如果不清楚用途可以跳过修改
cat config-example.txt# JumpServer configuration file example.
#
# If you don’t understand the purpose, you can skip modifying this configuration file, the system will automatically fill in
# Complete parameter documentation https://docs.jumpserver.org/zh/v3/guide/env/################################# Image Configuration #################################
#
# The connection to docker.io in China will timeout or the download speed will be slow, enable this option to use Huawei Cloud image acceleration
# Replace the old version DOCKER_IMAGE_PREFIX
#
# DOCKER_IMAGE_MIRROR=1# Image pull policy Always, IfNotPresent
# Always means that the latest image will be pulled every time, IfNotPresent means that the image will be pulled only if it does not exist locally
#
# IMAGE_PULL_POLICY=Always############################## Installation Configuration #############################
#
# JumpServer database persistence directory, by default, recordings, task logs are in this directory
# Please modify according to the actual situation, the database file (.sql) and configuration file backed up during the upgrade will also be saved to this directory
#
VOLUME_DIR=/data/jumpserver# Encryption key, please ensure that SECRET_KEY is consistent with the old environment when migrating, do not use special strings
# (*) Warning: Keep this value secret.
# (*) Do not disclose SECRET_KEY to anyone
#
SECRET_KEY=# The token used by the component to register with core, please keep BOOTSTRAP_TOKEN consistent with the old environment when migrating,
# Do not use special strings
# (*) Warning: Keep this value secret.
# (*) Do not disclose BOOTSTRAP_TOKEN to anyone
#
BOOTSTRAP_TOKEN=# Log level INFO, WARN, ERROR
#
LOG_LEVEL=ERROR# The network segment used by the JumpServer container, please do not conflict with the existing network, modify according to the actual situation
#
DOCKER_SUBNET=192.168.250.0/24# ipv6 nat, no need to enable under normal circumstances
# If the host does not support ipv6, enabling this option will prevent the real client ip address from being obtained
#
USE_IPV6=0
DOCKER_SUBNET_IPV6=fc00:1010:1111:200::/64################################# DB Configuration ####################################
# For external databases, you need to enter the correct database information, the system will automatically handle the built-in database
# (*) The password part must not contain single quotes and double quotes
#
DB_ENGINE=postgresql
DB_HOST=postgresql
DB_PORT=5432
DB_USER=postgres
DB_PASSWORD=
DB_NAME=jumpserver# If external MySQL needs to enable TLS/SSL connection, refer to https://docs.jumpserver.org/zh/v3/installation/security_setup/mysql_ssl/
#
# DB_USE_SSL=true################################# Redis Configuration #################################
# For external Redis, please enter the correct Redis information, the system will automatically handle the built-in Redis
# (*) The password part must not contain single quotes and double quotes
#
REDIS_HOST=redis
REDIS_PORT=6379
REDIS_PASSWORD=# If you are using external Redis Sentinel, please manually fill in the following content
#
# REDIS_SENTINEL_HOSTS=mymaster/192.168.100.1:26379,192.168.100.1:26380,192.168.100.1:26381
# REDIS_SENTINEL_PASSWORD=your_sentinel_password
# REDIS_PASSWORD=your_redis_password
# REDIS_SENTINEL_SOCKET_TIMEOUT=5# If external Redis needs to enable TLS/SSL connection, refer to https://docs.jumpserver.org/zh/v3/installation/security_setup/redis_ssl/
#
# REDIS_USE_SSL=true################################# Access Configuration ################################
# The service port provided to the outside, if it conflicts with the existing service, please modify it yourself
#
HTTP_PORT=80################################# HTTPS Configuration #################################
# Refer to https://docs.jumpserver.org/zh/v3/installation/proxy/ for configuration
#
# HTTPS_PORT=443
# SERVER_NAME=your_domain_name
# SSL_CERTIFICATE=your_cert
# SSL_CERTIFICATE_KEY=your_cert_key
## Nginx file upload and download size limit
#
CLIENT_MAX_BODY_SIZE=4096m################################# Component Configuration #############################
# Component registration use, by default, register to the core container, the cluster environment needs to be modified to the cluster vip address
#
CORE_HOST=http://core:8080
PERIOD_TASK_ENABLED=true# Core Session definition,
# SESSION_COOKIE_AGE indicates how many seconds the session expires after idling,
# SESSION_EXPIRE_AT_BROWSER_CLOSE=true means that the session expires as soon as the browser is closed
#
# SESSION_COOKIE_AGE=86400
SESSION_EXPIRE_AT_BROWSER_CLOSE=false# Trusted DOMAINS definition,
# Define the trusted access IP, please modify according to the actual situation, if it is a public IP, please change to the corresponding public IP,
# DOMAINS=”demo.jumpserver.org:443″
# DOMAINS=”172.17.200.191:80″
# DOMAINS=”demo.jumpserver.org:443,172.17.200.191:80″
DOMAINS=# Configure the components that do not need to be started, by default all components will be started, if you do not need a certain component, you can set {component name}_ENABLED to 0 to turn it off
# CORE_ENABLED=0
# CELERY_ENABLED=0
# KOKO_ENABLED=0
# LION_ENABLED=0
# CHEN_ENABLED=0
# WEB_ENABLED=0# Lion enables font smoothing to optimize the experience
#
JUMPSERVER_ENABLE_FONT_SMOOTHING=true################################# XPack Configuration #################################
# XPack package, invalid setting in open source version
#
SSH_PORT=2222
RDP_PORT=3389
XRDP_PORT=3390
MAGNUS_MYSQL_PORT=33061
MAGNUS_MARIADB_PORT=33062
MAGNUS_REDIS_PORT=63790
MAGNUS_POSTGRESQL_PORT=54320
MAGNUS_SQLSERVER_PORT=14330
MAGNUS_ORACLE_PORTS=30000-30030################################## Other Configuration ################################
# The terminal uses the host HOSTNAME as the identifier, automatically generated during the first installation
#
SERVER_HOSTNAME=${HOSTNAME}# Use built-in SLB, if the client IP address obtained by the Web page is not correct, please set USE_LB to 0
# When USE_LB is set to 1, use the configuration proxy_set_header X-Forwarded-For $remote_addr
# When USE_LB is set to 0, use the configuration proxy_set_header X-Forwarded-For $proxy_add_x_forwarded_for
USE_LB=1# The current running version number of JumpServer, automatically generated after installation and upgrade
#
TZ=Asia/Shanghai
CURRENT_VERSION=# 安装
./jmsctl.sh install# 启动
./jmsctl.sh start
安装完成后 JumpServer 配置文件路径为: /opt/jumpserver/config/config.txt
cd jumpserver-ce-v4.10.2-x86_64
# 启动
./jmsctl.sh start# 停止
./jmsctl.sh down# 卸载
./jmsctl.sh uninstall# 帮助
./jmsctl.sh -h
安装成功后,通过浏览器访问登录JumpServer:
地址: http://<JumpServer服务器IP地址>:<服务运行端口>
用户名: admin
密码: ChangeMe
准备两个测试资产和一个数据库来验证功能。
| IP地址 | 主机名 | 端口 | 操作系统 | 管理员用户 | 密码 |
| 172.16.80.11 | test_ssh01 | 22 | Centos 7 | root | Test2020.L |
| 172.16.80.21 | test_rdp01 | 3389 | Windows 10 | administrator | Test2020.W |
| 172.16.80.31 | test_mysql01 | 3306 | MySQL 5 | root | Test2020.M |
注意:
- Windows资产如需执行更新资产信息、可连接性测试等自动化任务,需先进行Windows SSH设置,此非登录Windows资产的必填项;
- MySQL应用需要授权Core和KoKo的远程访问的权限MySQL应用要求。
JumpServer堡垒机支持的资产类型包括:
- SSH(Linux/Unix/网络设备等)
- Windows(Web方式连接/原生RDP连接)
- 数据库(MySQL/MariaDB/Oracle/SQLServer/PostgreSQL/ClickHouse等)
- NoSQL(Redis/MongoDB等)
- 云服务(Kubernetes/VMwarev Sphere等)
- Web站点(各类系统的Web管理后台)
- 应用(通过Remote App连接各类应用)
进入资产管理-资产列表,右键根节点Default新建子节点:
plaintext
Default
├─ SSH Server(Linux服务器)
├─ RDP Server(Windows服务器)
└─ DB Server(数据库)
注意:根节点不可重命名,可右键添加/删除子节点。
3、创建资产Linux资产示例:
- 名称:test_ssh01
- IP:172.16.80.11
- 资产平台:Linux
- 节点:/Default/SSH Server
- 账号:添加root用户,密码Test2020.L
Windows资产注意事项:如需自动化测试(如更新资产信息),需先配置 Windows SSH 服务(非登录必需)。
连接测试:保存后刷新页面,绿色图标表示连接正常;黄色 / 红色可点击资产名称→快速修改→测试可连接性,按提示排查(如 Linux 需 Python≥2.6,Windows 需安装OpenSSH Server)。
4、创建数据库资产选择资产管理-资产列表-创建-数据库-MySQL:
- 名称:test_mysql01
- 地址:172.16.80.31
- 节点:/Default/DB Server
- 数据库:test(需提前创建)
- 账号:添加root用户,密码Test2020.M
进入权限管理-资产授权-创建:
- 名称:admin_ssh01
- 用户:Administrator(admin)(或用户组)
- 资产:test_ssh01(或选择节点包含所有资产)
- 账号:所有账号
- 动作:全部(允许所有操作)
注意:
- 用户 / 用户组、资产 / 节点二选一,避免重复选择;
- 不同类型资产(如 Linux/Windows)需分别创建授权。
登录后点击右上角Web终端,即可访问被授权的资产。若看不到资产,联系管理员确认授权是否正确。
五、JumpServe堡垒机系统设置1、基本设置
| 名称 | 示例 | 备注 |
| 当前站点URL | https://www.idcspy.com/ | 不设置的话,邮件收到的地址为 http://localhost |
| 用户向导URL | 用户首次登录可以看到此 超链接,可以不设置 | |
| 忘记密码URL | 使用了 LDAP, OPENID 等外部认证系统,可以自定义 |
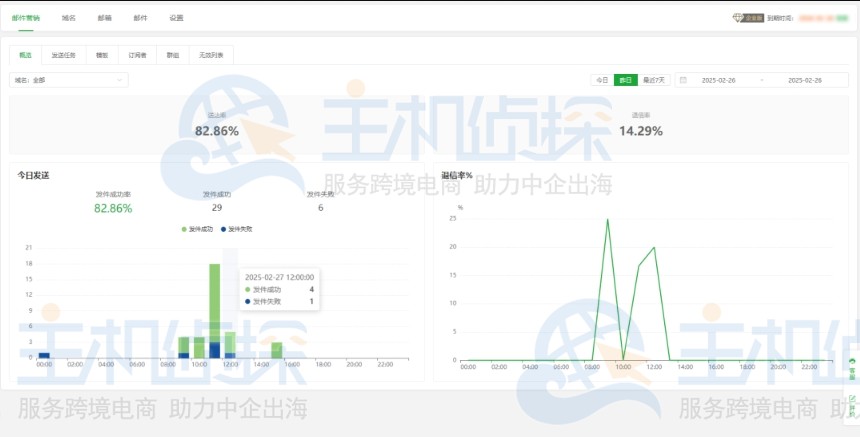
2、邮件设置(SMTP示例)
| 名称 | 示例 | 备注 |
| SMTP主机 | smtp.qq.com | 服务商提供的smtp服务器 |
| SMTP端口 | 25 | 通常是25 |
| SMTP账号 | **********@qq.com | 通常是user@domain.com |
| SMTP密码 | **************** | 每次测试连接都需要重新输入密码 |
| 使用SSL | [ ] | 如果端口使用465,必须勾选此项 |
| 使用TLS | [ ] | 如果端口使用587,必须勾选此项 |
| 发件人 | **********@qq.com | 测试连接必须要输入 |
| 主题前缀 | [JMS] | 邮件的标题,收到的邮件是[JMS]开头 |
| 测试收件人 | **********@qq.com | 测试连接必填 |
注意:不可同时勾选“使用SSL”和“使用TLS”。
(本文由美国主机侦探原创,转载请注明出处“美国主机侦探”和原文地址!)

微信扫码加好友进群
主机优惠码及时掌握

QQ群号:164393063
主机优惠发布与交流

&url=https://www.idcspy.com/126728.html&pic=https://www.idcspy.com/wp-content/uploads/2025/07/JumpServer1-150x150.jpg)
&url=https://www.idcspy.com/126728.html&pics=https://www.idcspy.com/wp-content/uploads/2025/07/JumpServer1-150x150.jpg)