


Jumpserver是一款流行的开源堡垒机,可以帮助企业以更安全的方式管控和登录所有类型的资产,实现事前授权、事中监察、事后审计,满足等保合规要求。目前用户可以在美国主机商Hostinger提供的VPS上进行安装,为方便大家了解,本文就来详细带大家一起来实地操作一下,仅供参考。
Hostinger官网:点击进入

一、购买并部署Hostinger VPS
1、进入Hostinger官网,注册并登录。
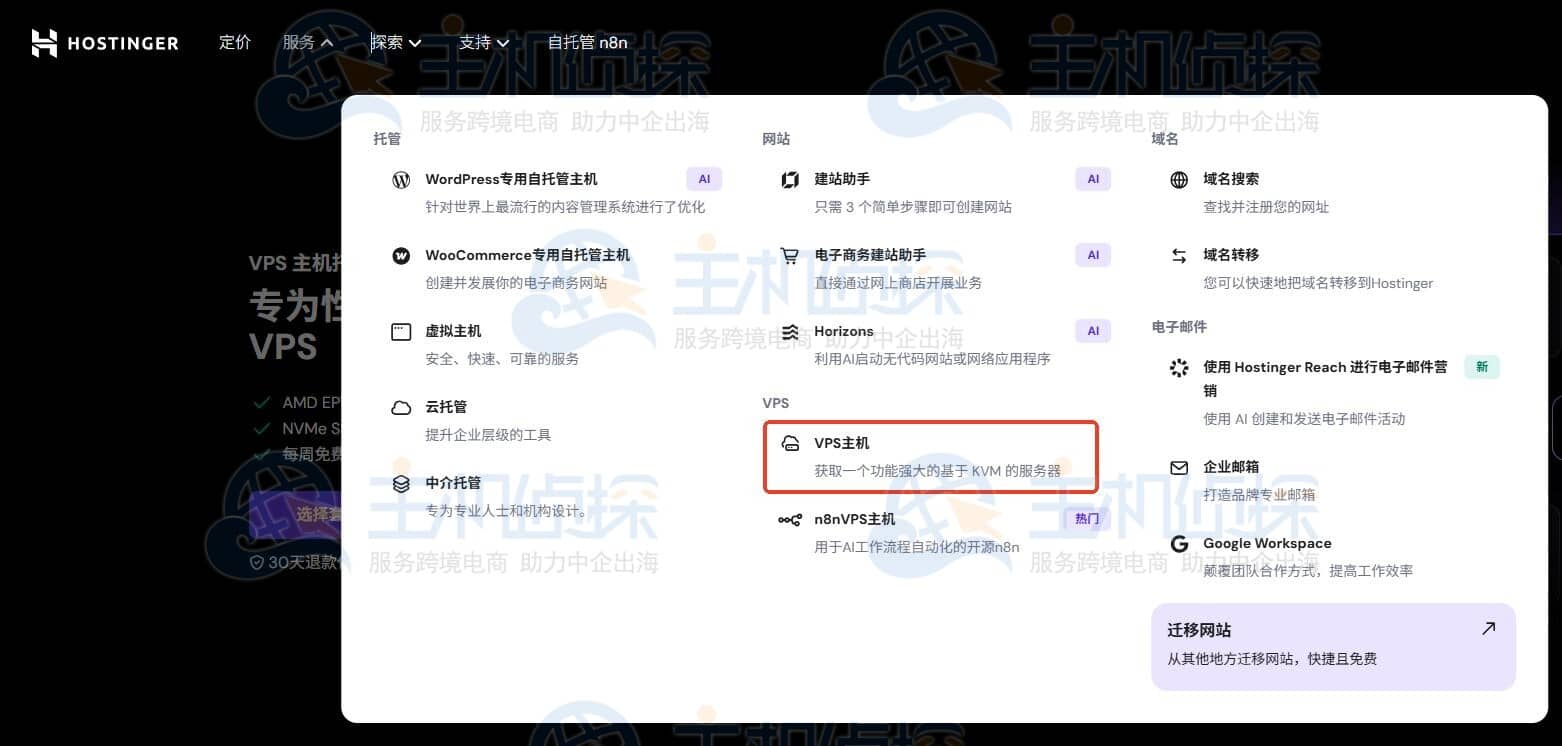
2、选择“服务”,选择“VPS主机”。
3、进入Hostinger VPS服务器选购页面,如下:
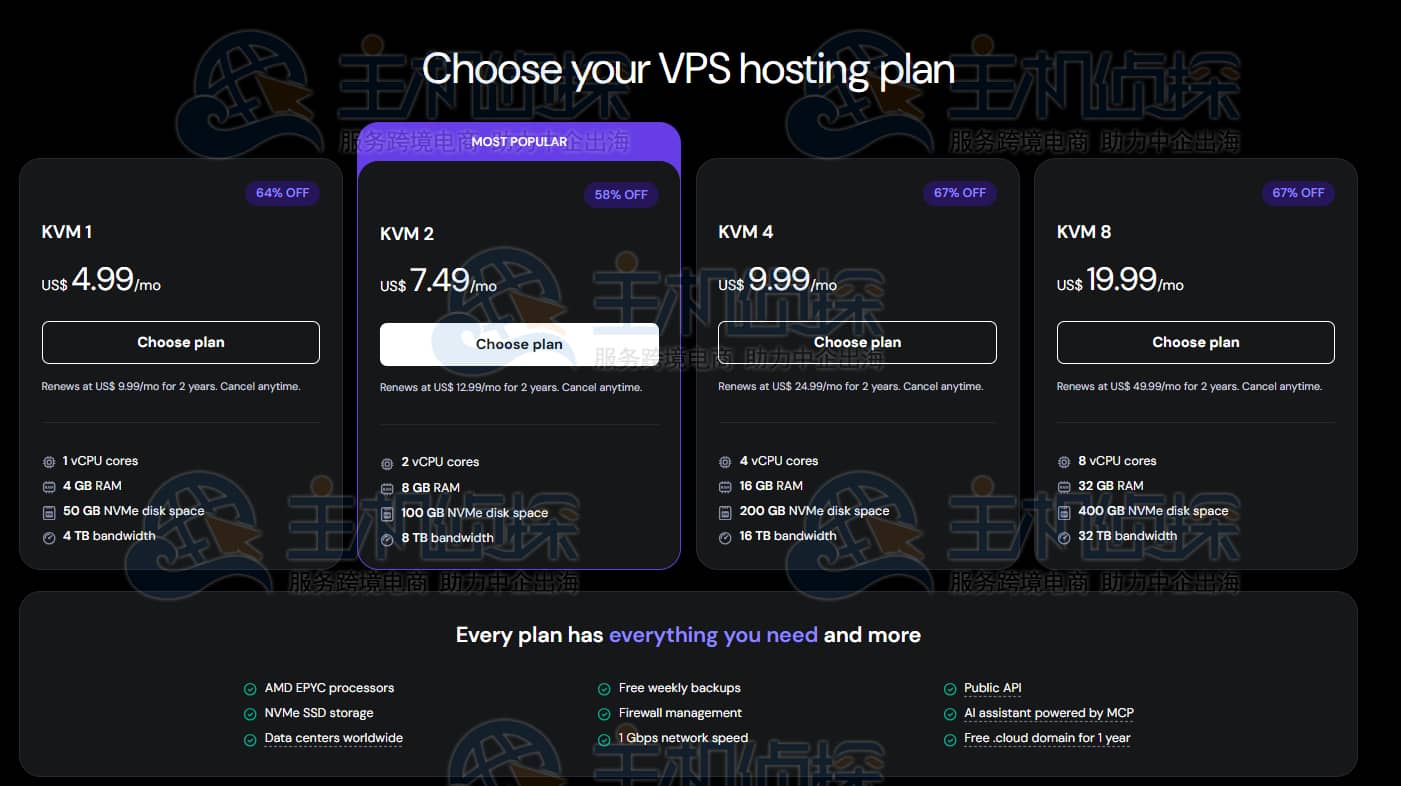
Hostinger VPS服务器购买方案推荐
| 方案 | CPU | 内存 | 硬盘 | 流量 | 优惠价/月 |
| KVM 1 | 1vCPU | 4GB | 50GB NVMe | 4TB | $4.49 |
| KVM 2 | 2vCPU | 8GB | 100GB NVMe | 8TB | $6.29 |
| KVM 4 | 4vCPU | 16GB | 200GB NVMe | 16TB | $8.99 |
| KVM 8 | 8vCPU | 32GB | 400GB NVMe | 32TB | $17.99 |
《点击进入官网购买》
- 服务器规格:根据实时用户访问人数来选择,推荐KVM 2及以上。本文选择的是KVM 4方案,配置为4核CPU、16GB内存、200GB NVMe存储。
- 操作系统:建议选择Debian/Ubuntu。
4、确认好要选择的方案后点击“选择套餐”,使用Hostinger优惠码IDCSPY
付款即可。
5、等待Hostinger VPS服务器创建完毕后,获取服务器IP和root密码。
相关推荐:
二、安装Jumpserver堡垒机本文选择离线安装Jumpserver。
1、通过SSH工具,如Xshell、Putty等连接Hostinger VPS服务器。
ssh root你的服务器IP
2、更新系统(Debian/Ubuntu)
apt-get update apt-get install -y wget curl tar gettext iptables
3、下载最新的linux/amd64离线包,并上传到部署服务器的/opt目录。
cd /opt tar -xf jumpserver-ce-v4.4.1-x86_64.tar.gz cd jumpserver-ce-v4.4.1-x86_64 # 安装 ./jmsctl.sh install # 启动 ./jmsctl.sh start
4、安装成功,显示如下:
>>> The Installation is Complete 1. You can use the following command to start, and then visit cd /opt/jumpserver-ce-v4.4.1-x86_64 /opt/jumpserver-ce-v4.4.1-x86_64/jmsctl.sh start 2. Other management commands /opt/jumpserver-ce-v4.4.1-x86_64/jmsctl.sh stop /opt/jumpserver-ce-v4.4.1-x86_64/jmsctl.sh restart /opt/jumpserver-ce-v4.4.1-x86_64/jmsctl.sh backup /opt/jumpserver-ce-v4.4.1-x86_64/jmsctl.sh upgrade For more commands, you can enter ./jmsctl.sh –help to understand 3. Web access http://192.168.1.121:80 Default username: admin Default password: ChangeMe
5、查看正在运行的容器:
[root@node121 ~]# docker ps CONTAINER ID IMAGE COMMAND CREATED STATUS PORTS NAMES 27241322b803 jumpserver/koko:v4.4.1-ce “./entrypoint.sh ./k…” 5 hours ago Up 5 hours (healthy) 0.0.0.0:2222->2222/tcp, :::2222->2222/tcp jms_koko 76dda2c4c06c jumpserver/core:v4.4.1-ce “./entrypoint.sh sta…” 5 hours ago Up 5 hours (healthy) 8080/tcp jms_core df05a6e1df0e jumpserver/chen:v4.4.1-ce “./entrypoint.sh wisp” 5 hours ago Up 5 hours (healthy) 8082/tcp jms_chen 099a575dc8a9 redis:7.0-bullseye “docker-entrypoint.s…” 5 hours ago Up 5 hours (healthy) 6379/tcp jms_redis 716f50d4f2f0 jumpserver/web:v4.4.1-ce “/docker-entrypoint.…” 5 hours ago Up 5 hours (healthy) 0.0.0.0:80->80/tcp, :::80->80/tcp jms_web 5afd8a649cc4 jumpserver/lion:v4.4.1-ce “./entrypoint.sh sup…” 5 hours ago Up 5 hours (healthy) 4822/tcp, 8081/tcp jms_lion 421b962cb795 postgres:16.3-bullseye “docker-entrypoint.s…” 5 hours ago Up 5 hours (healthy) 5432/tcp jms_postgresql 72521dbb2adc jumpserver/core:v4.4.1-ce “./entrypoint.sh sta…” 5 hours ago Up 5 hours (healthy) 8080/tcp jms_celery
5、安装成功后,通过浏览器访问登录JumpServer。
http://192.168.1.121:80访问JumpServer,输入用户名和密码后点击登录。
相关推荐:
《JumpServer堡垒机入门完整指南(安装+管理+设置)》
(本文由美国主机侦探原创,转载请注明出处“美国主机侦探”和原文地址!)

微信扫码加好友进群
主机优惠码及时掌握

QQ群号:164393063
主机优惠发布与交流

